This lesson, we will be installing Kali Linux which is a Hacking/Penetration Testing Operating System. Kali has all of the tools that professionals use in the real world.
We will start off by downloading the operating system. Go to https://www.kali.org/downloads/
This page brings up a couple of different options on how to download it. It asks whether you want to download a 64 bit or a 32 bit version as well.
To check if your computer is a 32 or 64 bit machine, right click the start button on the bottom right. Then click system and you should see a window like this:
Under System Type, it shows my machine is a 64-bit operating system.
So on the Kali Website, I would download the Top option that says Kali Linux 64 Bit. To start the Download, click the HTTP under the download column.
After the file is downloaded, go back to Virtual box and click New
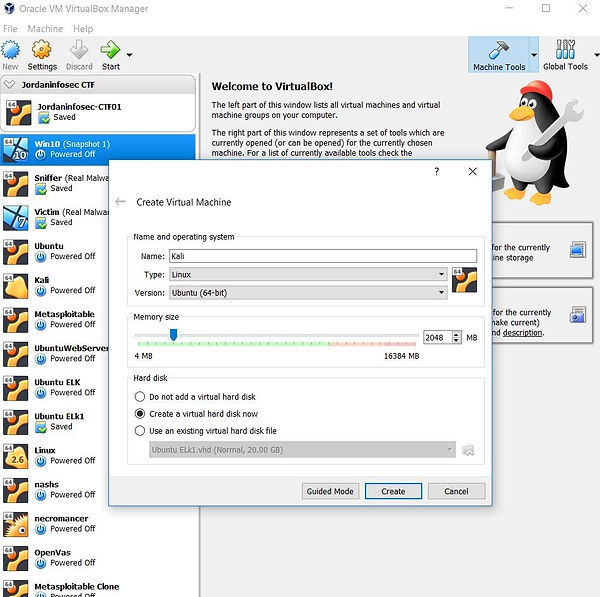
This screen should show up. Give the Machine a name, whatever you like.
For type, choose Linux and Version choose Linux, 64 or 32 bit, depending on your computer.
You can increase the memory if you’d like to, this will make the virtual machine faster. Do not place the cursor into the red because that will make your real computer slower.
For Hard Disk, Choose Create a Virtual hard disk now. This will use the space on your computer as its own hard drive.
Click Create.
You can leave the file location as the default.
Change the File Size to 20.00GB or more.
Choose the Hard disk file type as Virtual Hard Disk or VHD.
Click Create.
You should see the Virtual Machine you created on the left panel of the home screen in Virtual Box.
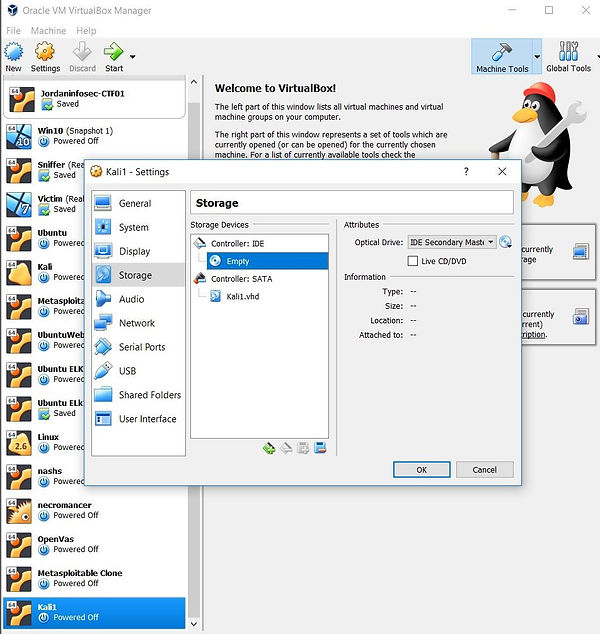
Before you start it, right click it and click Settings. This menu allows you to make changes to this virtual machine. You should look at it and see what all can be done.
For now, click Storage.
At the top right of the Setting window, there is a small picture of a CD with a black downward facing arrow, click that and click Choose Virtual Optical Disk File. This is the file that you just downloaded from the Kali Linux Website.
Find the file and click it, after you have clicked it, the file should show up on the Storage Devices Panel that is in the middle of the screen. This is simulating that you are putting a CD with Kali on it, inside your computer.
Then Click the Network button on the left panel.
.
This is how your machine will get its internet access.
For Attached to: Click Bridged Adapter. This allows the virtual machine to use your computers network card to get internet access.
The name for the card will be different than shown. If your using your wireless card, the name should say something like wireless on it.
Click allow for Promiscuous mode and then click the OK button.
Finally, the Virtual Machine is ready to go. Click on the next tutorial to see how to install Kali and configure it.